DNSed: A simple useable internet name for large scale IoT

Intent

When there is a city wide Wireless Sensor Network (WSN), this has to be resolved with anything meaningful, say name of where it is located. then this has to be the name that it should be resolved to.

to creat DNSed, as in past tense in English for DNS. To DNS the shit out of the IoT. To create an amazing network and to overload the DNS servers. To create everything out in the open, so everything in the Hollywood movies can come true.

Scenario

  • When a water tank level indicator at place called “Meereen”.
  • There is a number for the water tank which is 256.

then, this can be described in the internet nomenclature as

  • domain name: meereen.got
  • object: water tank
  • number: 256
  • sensor type: level indicator

this would translate to an internet name of “level.256.water.meereen.got”

usually, there is only a sensor in a an area and they are organised in cluster.

in that case, Meereen’s water tank is being referenced, and the sensor 256 is being addressed where the level is being asked for, https://256.water.meereen.got/level where level is a service provided by the sensor


Possibility:

It is possible to use BIND9 to build a DNS server, then create the zone records to point to the different sensors. the tutorial gives a good insight on deploying a BIND9 DNS server [3]. There are very good python libraries available in such an instance to build an DNS server and then work with their API. The following are some interesting DNS APIs for python to process DNS records on server.

[1] http://www.dnspython.org

[2] https://pypi.python.org/pypi/easyzone/1.2.1

Implementation:

In this effort, the implementation takes advantage of the REST API provided by DigitalOcean to make the DNS. as the idea is to create a very dynamic name resolution for IoT devices and this does not involve building a DNS server from scratch. The DNSed will be a library that will used in the IoT devices as well to communicate to the central server which will be further proxied to the DNS Server of DigitalOcean. This architecture would provide a method to have a better security by not distributing the API keys throughout the network on every device.

The functional block diagram below tries to describes this exact architecture

drawit-diagram-2

References:

[1] http://www.dnspython.org

[2] https://pypi.python.org/pypi/easyzone/1.2.1

[3] https://www.digitalocean.com/community/tutorials/how-to-configure-bind-as-a-private-network-dns-server-on-ubuntu-14-04

[4] https://developers.digitalocean.com/documentation/v2/#domain-records

[5]
drawit-diagram-1

SensyLight: sensible atmosphere using Internet of Things

https://vimeo.com/192196471

The above video is from a research lab at the MIT Media Lab called Responsive Environments. They have a really interesting article [1] about a multimodal mediated work environment.

Internet of Things has been of great buzz these days. It is interesting, but why is it interesting? Just made a project/home lighting on this project.

So, here is the scenario for the internet of things. The thing in the Internet of Things is the web controlled lights – LED strip. The “control” part of the lights is managed by the Arduino. The task of Arduino would be to “GET” data that matters and send that info to the light strip. The ways in which the LED strip can be manipulated from the Arduino can be listed as

  • 1 LED can have 3 inputs, R G B.
  • Each R G B can value from 0 – 255 which is 256 values.
  • There are 32 LEDs in the strip.

Which makes a lot of math and logical decisions for the Arduino to handle. That is the whole point of networking these devices, now they have access to on-demand computing resources. This means we need the medium to connect the Arduino to the internet. That is done using the WiFi module which communicates with the Arduino using USART communication.

There are two ways to handle the information flow:

  • To directly to give out RGB information an hour
    • A lot of data transfer between the devices, but all of the computing, the decision is taken care of by the remote server
    • the device is highly dependent on the connection for operation
  • To query the server for Sunlight information (sunrise and sunset) and compute the colour information.
    • Having an update system to change the “compute” algorithm makes it highly robust.
    • Gets information for a day / a week and then “compute” with the algorithm. Also, listen for any settings like
      • Party lights
      • Work lights
      • get back to sunlight operation

Tools used:

Low cost, easy implementation of mediated atmospheres, to make your apartment to provide sensible lighting that can help harmonize the body and mind with the circadian rhythm.

[1] 17161.JosephA.Paradiso.Preprint1.pdf

[2] 192196471

Multi-threading in Python: A quick guide for python multithreading

All the resources for multi-threading python programming.

import threading

Thats all is there in python multi processing! Of course you should know what to use where? I found this great slideshare option that you should go through to get up and running in python multi processing. An Introduction to Python Concurrency.
Semaphore is the oldest parallel processing concepts. Which of course highly useful for any multi processing programs. For me it was a SPI Bus accessed using a raspberry pi. There are 4 chip selects and each communication event is a new thread. To provide access to a single bus, semaphore was used. Its implementation is straight forward in python.

parallelProc = threading.Semaphore(1) #parallelProc is the object that holds the semaphore and allows only one concurrent process.

now, it might get painful to get the acquire and release right, but otherwise it is great!

def communicationEvent():
parallelProc.acquire()
print 'Doing bus transactions here!'
parallelProc.release()

Finding time for adding more of the concepts in the future
One might think life just got easier with multi-threading, but thats when shit gets real! (Ned Stark way of telling)

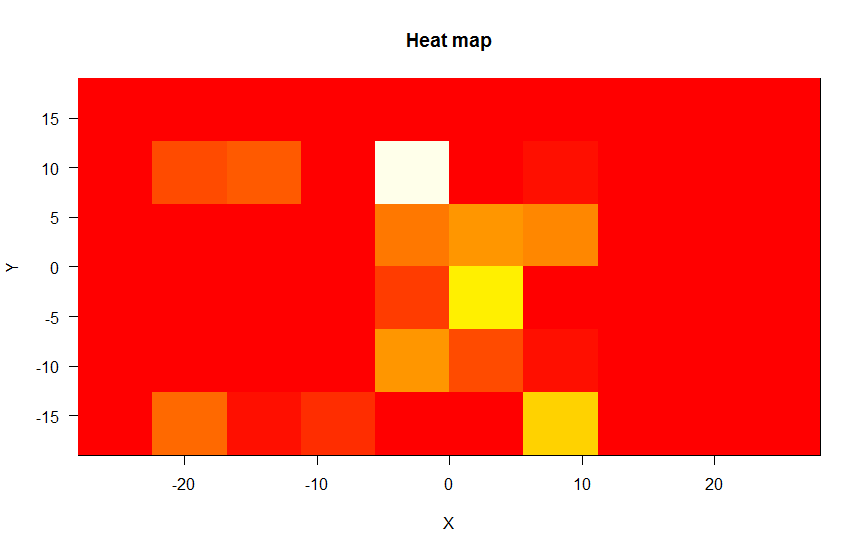
Generating Heat Maps for eye-tracker data

Heatmap generated for the userXX

A heat map is a graphical representation of data where the individual values contained in a matrix are represented as colors. –Wikipedia

 Concept

Here is my approach to deal with it. All that is need is a frequency of a value being repeated in case of one dimension and then creating a color  map for high to low and plotting them on a graph. Continue reading “Generating Heat Maps for eye-tracker data”

WiFi Positioning System – Using Python and Google Geolocation API

I consider there is these following steps involved for such a program.

I will keep this as a documentation as well as a progress report to keep track of the project.

  1. Reading all the required information
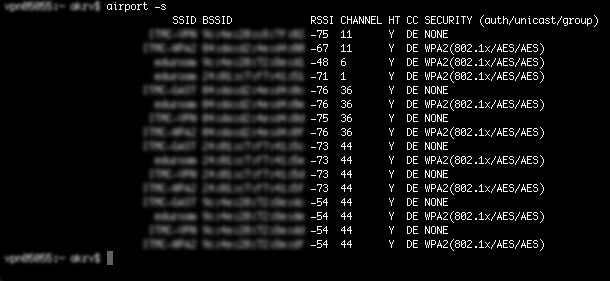
    1. Reading SSID in MAC
      • Using Airport Shell command
      • Here is how it should look: [viraldownloader id=180]
    2. Reading SSID in Linux (Ubuntu), Windows
      • identify shell command for linux/Ubuntu
      • identify shell command for windows
  2. Parsing them in JSON format
    1. Parsing information into required information into prescribed format
  3. CURL and Get the Location information in JSON
  4. Parse it and display on google
  5. Building a GUI

Here is the gitHub repository for the project that I am working on.

https://github.com/akrv/pyWPSLocalisation

Feel free to contribute/contact it is interesting for you aswin[at]southpaw.in

Setting up your first psychoPy application in Eclipse

http://www.psychopy.org

I believe you have already ready the previous post about setting up the environment. if not do it here! <PSYCHOPY APP DEVELOPMENT IN PYTHON USING ECLIPSE AND PYDEV>

So, now you are for sure ready with the environment and already created your first application on python. But psychoPy? yes, its not a big deal, you are 80% complete from creating an application in psychoPy already.

These following steps hit the rest 20%.

Set up the interpreter to be psychoPy. This enables you to use psychoPY API. Continue reading “Setting up your first psychoPy application in Eclipse”

PsychoPy app development in Python using Eclipse and pyDev

Install and setup psychoPy and using Eclipse and python for development of applications. I developed an application that used a eye tracker. It was a great idea to use python to interface the eye tracker with the routine which was created using psychoPy.

Creating a new pydev module to start coding

In this post, it is only about installing psychoPy, Python, Eclipse, pyDev for Eclipse and starting a new project. Creating your first psychoPy application with its specification will be in the following post.

Continue reading “PsychoPy app development in Python using Eclipse and pyDev”