SensyLight: sensible atmosphere using Internet of Things

https://vimeo.com/192196471

The above video is from a research lab at the MIT Media Lab called Responsive Environments. They have a really interesting article [1] about a multimodal mediated work environment.

Internet of Things has been of great buzz these days. It is interesting, but why is it interesting? Just made a project/home lighting on this project.

So, here is the scenario for the internet of things. The thing in the Internet of Things is the web controlled lights – LED strip. The “control” part of the lights is managed by the Arduino. The task of Arduino would be to “GET” data that matters and send that info to the light strip. The ways in which the LED strip can be manipulated from the Arduino can be listed as

  • 1 LED can have 3 inputs, R G B.
  • Each R G B can value from 0 – 255 which is 256 values.
  • There are 32 LEDs in the strip.

Which makes a lot of math and logical decisions for the Arduino to handle. That is the whole point of networking these devices, now they have access to on-demand computing resources. This means we need the medium to connect the Arduino to the internet. That is done using the WiFi module which communicates with the Arduino using USART communication.

There are two ways to handle the information flow:

  • To directly to give out RGB information an hour
    • A lot of data transfer between the devices, but all of the computing, the decision is taken care of by the remote server
    • the device is highly dependent on the connection for operation
  • To query the server for Sunlight information (sunrise and sunset) and compute the colour information.
    • Having an update system to change the “compute” algorithm makes it highly robust.
    • Gets information for a day / a week and then “compute” with the algorithm. Also, listen for any settings like
      • Party lights
      • Work lights
      • get back to sunlight operation

Tools used:

Low cost, easy implementation of mediated atmospheres, to make your apartment to provide sensible lighting that can help harmonize the body and mind with the circadian rhythm.

[1] 17161.JosephA.Paradiso.Preprint1.pdf

[2] 192196471

Developing for ESP8266 using Arduino IDE

Cut to action steps:

  1. Install Arduino IDE
  2. Install board support packages to compile for ESP8266
    1. http://arduino.esp8266.com/stable/package_esp8266com_index.json
    2. How and where to do it!
      1. first add that URL in the additional board managers URL
      2. now goto the board manager and look for ESP8266 and install the package
      3. compile your first program, don’t upload yet
      4. To upload, if you have NodeMCU, Arduino takes care of turning the boot-loader mode. if any other, then better to put it yourself into boot-loader mode.

Enjoy ESP8266 development!


3 step procedure for installing raspian SD card image on Mac osX : CLI based

Yup, just like always open the terminal and put in the following to find the dev path of the SD card.

diskutil list

Screen Shot 2015-09-23 at 18.43.33
NO NAME with ID disk5 is what we will have to unmount

diskutil unmountDisk /dev/disk5

Screen Shot 2015-09-23 at 18.47.46
Now, copy the data to the SD card using the dd command on the terminal after to cd into the folder where you have downloaded the image. Usually its in the downloads folder when you do it with safari.
sudo dd bs=1m if=2015-05-05-raspbian-wheezy.img of=/dev/rdisk5

After sometime the terminal cursor blinks, it will look like the following image when it is successful. I didn’t come across the error from the actual source page, but when it does, look it up here -> Official Documentation (which is also my source)

Screen Shot 2015-09-23 at 18.55.05

as the title says, lets hit the raspberryPi with the new card and kick on with some electrons!

Multi-threading in Python: A quick guide for python multithreading

All the resources for multi-threading python programming.

import threading

Thats all is there in python multi processing! Of course you should know what to use where? I found this great slideshare option that you should go through to get up and running in python multi processing. An Introduction to Python Concurrency.
Semaphore is the oldest parallel processing concepts. Which of course highly useful for any multi processing programs. For me it was a SPI Bus accessed using a raspberry pi. There are 4 chip selects and each communication event is a new thread. To provide access to a single bus, semaphore was used. Its implementation is straight forward in python.

parallelProc = threading.Semaphore(1) #parallelProc is the object that holds the semaphore and allows only one concurrent process.

now, it might get painful to get the acquire and release right, but otherwise it is great!

def communicationEvent():
parallelProc.acquire()
print 'Doing bus transactions here!'
parallelProc.release()

Finding time for adding more of the concepts in the future
One might think life just got easier with multi-threading, but thats when shit gets real! (Ned Stark way of telling)

Installing MEAN stack for Fullstack application development

The best one liner for what MEAN stack is given in the following picture.Screen Shot 2015-01-18 at 22.48.40

MEAN stack is more like LAMP.

M = MongoDB

E = ExpressJS

A = AngularJS

N = NodeJS

MEAN Stack Logo

There has been a lot of development from Google for the AngularJS and NodeJS. They are minimalistic and javascript based, for now cutting edge web development tools.

For installing MEAN stack in ubuntu, follow the commands to set up your MEAN Stack. I deployed my server in Digitalocean which is like my obsessed service for cloud deployment.

Install MongoDB
#~ sudo apt-get install mongodb
Install NodeJS and Npm
#~ sudo apt-get install nodejs npm
and create a symlink
#~ sudo ln -s /usr/bin/nodejs /usr/bin/node
Install Bower
#~ sudo npm install -g bower
Install Grunt
#~ sudo npm install -g grunt-cli
Install MEAN
sudo npm install -g mean-cli
Init your first App
$ mean init testApp
type in your IPaddress with port 3000
http://xxx.xxx.xxx.xxx:3000

Generating Heat Maps for eye-tracker data

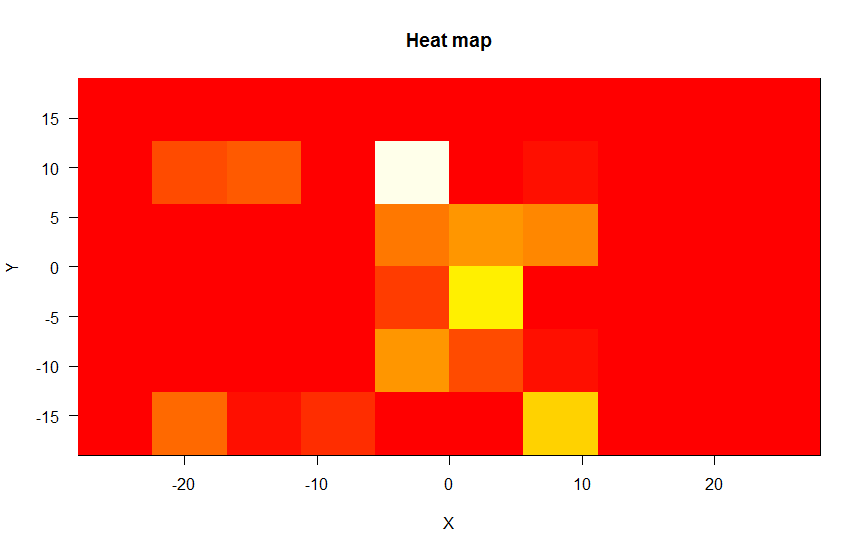
Heatmap generated for the userXX

A heat map is a graphical representation of data where the individual values contained in a matrix are represented as colors. –Wikipedia

 Concept

Here is my approach to deal with it. All that is need is a frequency of a value being repeated in case of one dimension and then creating a color  map for high to low and plotting them on a graph. Continue reading “Generating Heat Maps for eye-tracker data”

TI CC2530DK – Contiki OS – Internet of Things

This blog post is an effort to create a one stop information for starting off your Contiki project with cc2530DK.

There is enough information already available on Github wiki. This post is more than an extension to have all information under one place and as usual my way of documenting my projects!

Continue reading “TI CC2530DK – Contiki OS – Internet of Things”

Setting up your first psychoPy application in Eclipse

http://www.psychopy.org

I believe you have already ready the previous post about setting up the environment. if not do it here! <PSYCHOPY APP DEVELOPMENT IN PYTHON USING ECLIPSE AND PYDEV>

So, now you are for sure ready with the environment and already created your first application on python. But psychoPy? yes, its not a big deal, you are 80% complete from creating an application in psychoPy already.

These following steps hit the rest 20%.

Set up the interpreter to be psychoPy. This enables you to use psychoPY API. Continue reading “Setting up your first psychoPy application in Eclipse”